Roof Damage Repair
Flashing Failure Repair in Nampa, ID
Flashing failure repair on commercial roofs in Nampa, ID: curbs, parapets, pipes, and edges inspected, photographed, and re-detailed to the roof system.
Flashing Failure Repair
Most flashing leaks have a seam that moved. A commercial roof in Nampa, ID goes through a full cold season and a full dry warm season each year, and every joint where the membrane turns up a wall, around a curb, or over a pipe has to take that movement. When a flashing fails, the question is whether the sealant dried out, the fastener pulled, the substrate shifted, or the original detail was too thin. The record starts with a photograph of the joint, a measurement of the gap, and a location on the plan.
The repair follows from that finding, and the finding is written in terms the owner can use: which joint, what condition, which cause, and what method. A bare statement that a flashing leaked tells a facilities manager nothing about whether the next one will. Resealing a gap that is moving will fail again. A flashing that is wrongly detailed needs a new detail, not more sealant.

Where Flashings Fail
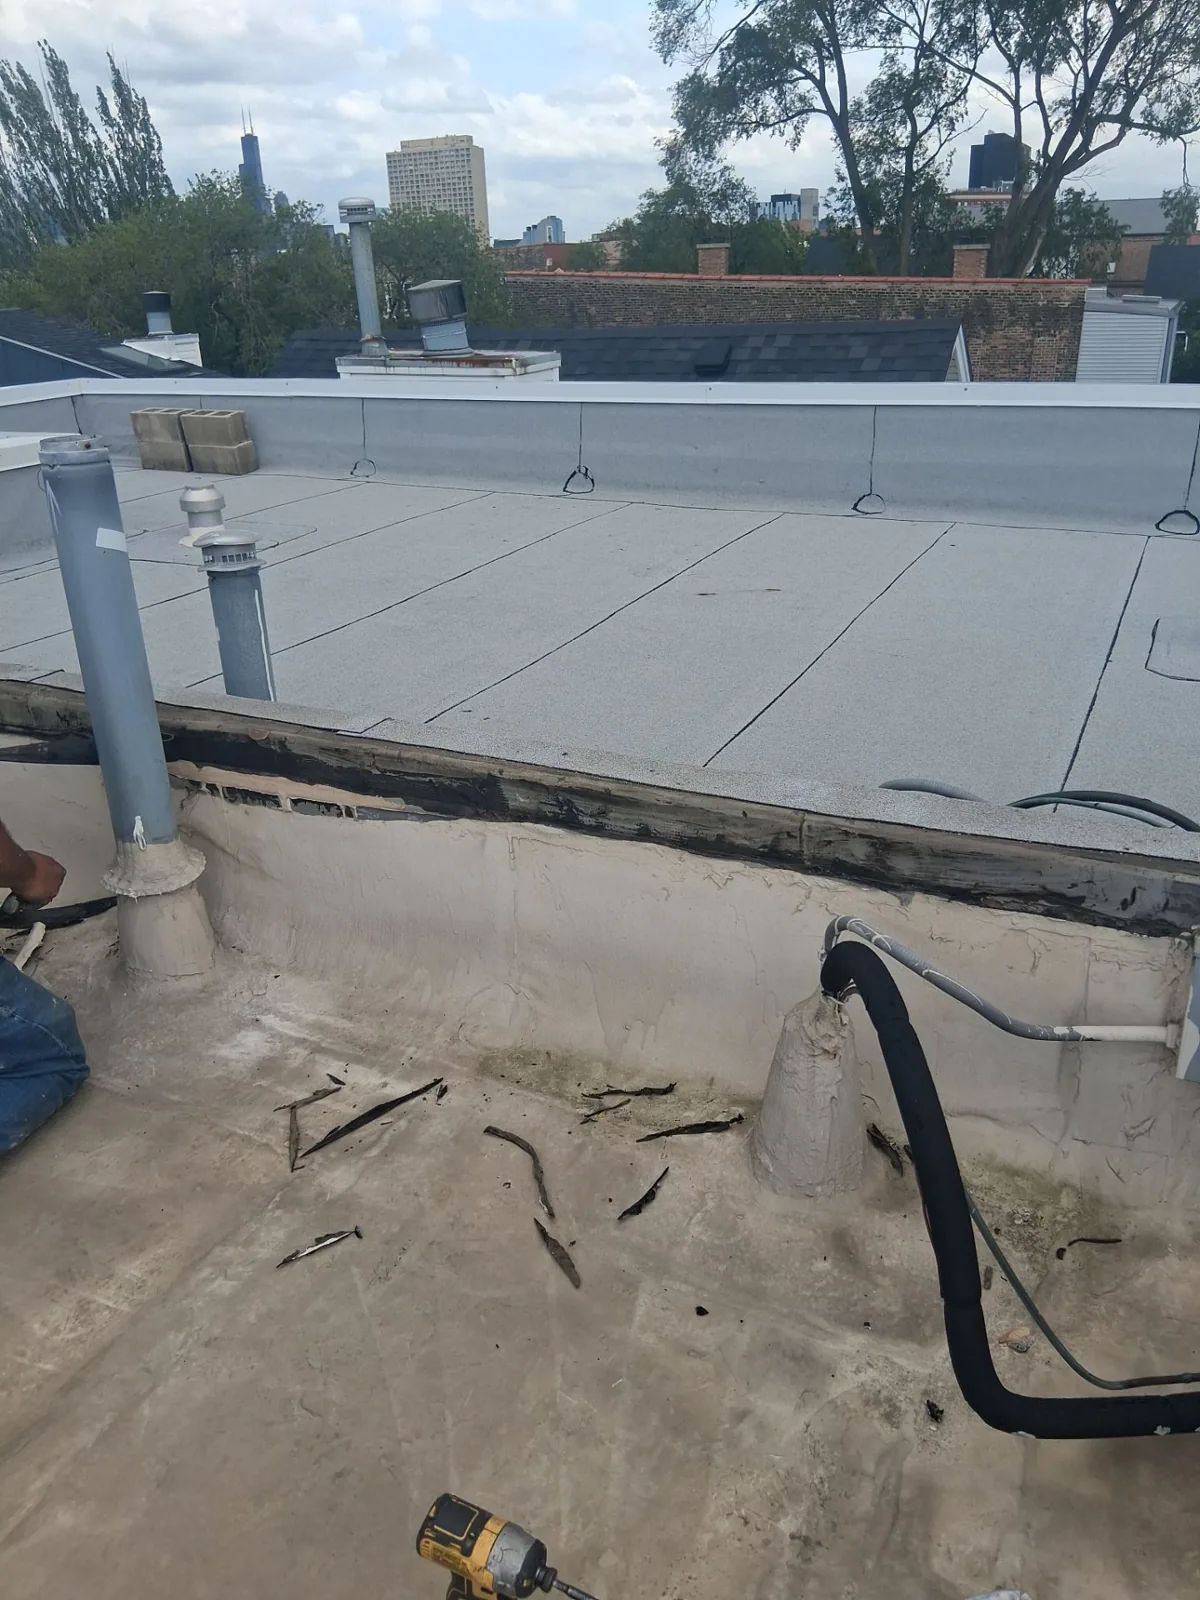
Failures concentrate at transitions. We check the base flashing at walls and parapets, the counterflashing above it, the curbs under rooftop units, pipe boots, drains, scuppers, and the edge metal at the perimeter. Each is a place where two materials meet and move at different rates. Metal expands more than membrane. Sealant hardens and cracks in cold weather. A boot sized for a pipe that has since been replaced with a larger one leaves a gap.
We number each flashing on the roof plan and photograph it from a fixed angle, with the date and the weather on the day, because a flashing seen after a week of dry weather behaves differently from one seen in a thaw. A year later, the same angle shows whether a gap widened or a termination bar lifted. For buildings on routes such as the Franklin corridor, where the north quadrant plan lists Franklin Avenue among the I-84 access overpasses, the same numbering applies. The numbering lets us tell the owner that the third curb on the north side is the one that failed, not just that the roof has a leak.
Observed Causes
The usual causes can be read on the roof. Sealant that has cracked or pulled away points to age and movement. A termination bar with missing fasteners points to wind or foot traffic. A base flashing that has slipped down a wall points to inadequate attachment above. A membrane that has shrunk away from a curb points to material aging. Metal with rust at its fasteners points to moisture trapped under it. Each cause has its own repair, and a mismatch between cause and repair is how a flashing fails twice.
Winter conditions add to the list. Winter design in Nampa assumes 10 degrees Fahrenheit, and inversions with snow cover can leave the valley colder than the readings taken at the Boise airport. Cold stiffens sealants and contracts metal, so a joint that holds in July can open in January. The repair detail has to tolerate that movement, either through a flexible termination or a mechanical lock.
Curbs, Supports, and Equipment
Rooftop units sit on curbs, and the curb flashing is among the most common leak sources on a commercial roof. Service technicians walk around the unit, drop tools, and lean on the flashing, and the membrane at the curb corner takes the worst of it. We check the curb height, the flashing height above the membrane, the corner details, and the counterflashing or sealant at the top. A flashing shorter than the recommended height for the system is a defect from the day it was built.
When the equipment changes, the curb often changes with it, and the flashing must be rebuilt. Our curb and support work includes new flashing, and the record shows who opened the roof and when. Under the Highway 16 area plan, a structure within 500 feet of the highway cannot carry roof-mounted mechanical units, so a building near the Highway 16 corridor may have no rooftop equipment curbs at all, and its flashing questions concentrate on walls, drains, and edges.
Repair Methods
Repairs follow the membrane. On a single-ply roof, a failed flashing is cut back to sound material and replaced with a new piece, welded or adhered to the field membrane and terminated with a bar and sealant. On modified bitumen, a new flashing ply is set in cold adhesive or torch-applied under controlled conditions. On a metal roof, the trim and sealant at the joint are replaced, and clips and fasteners are checked for movement.
Liquid-applied flashing resin is useful where the geometry is awkward, such as around a cluster of pipes or an irregular curb. It does not replace a missing detail. It is applied over a clean, primed, and sound substrate, and its cure and thickness are checked. We test the finished flashing with a probe at the termination and, where the roof allows, a water test over the detail. If the test is run on a day when the interior can be watched, the person inside reports the result, and the time is written next to the photograph. That small step turns a repair that looks right into one with evidence behind it. Flashings at skylights follow skylight and penetration flashing practice.
Tracing a Leak to a Flashing
An interior stain is not where the water got in. We match the stain to the roof above, look for flashings upslope of the stain, and test them with water in a controlled sequence. The sequence starts low and moves up, with one flashing wetted at a time, and the interior is watched for a drip. That practice finds the flashing that failed and rules out the neighbors. A leak repair built on that finding costs less than guesses applied across several joints.
When a flashing failure sits next to an open lap or a membrane that has aged in the sun, the repair scope includes those items, because a new flashing welded to a split seam or to a chalked membrane worn by heat and UV exposure will not hold. The adjoining membrane is tested for weldability before any new flashing is attached, and the result goes into the file.
Questions
Why does the same flashing leak again after sealant is added?
If the joint is moving, sealant alone cannot hold it. The repair needs a detail that allows movement or a mechanical termination that holds the flashing in place.
Which flashing fails most often?
Curb and penetration flashings, because they combine many corners, service traffic, and dissimilar materials. We number and photograph each so repeat failures are visible.
How is the failing flashing identified when the stain is far from it?
By matching the stain to the roof above and testing flashings upslope with water, one at a time, while watching the interior.
Can liquid flashing resin replace a damaged boot?
It can seal around a difficult shape when applied over a sound, primed substrate. It does not fix a boot that is the wrong size or one that has no support.
What does cold weather do to flashing?
It stiffens sealants and contracts metal. Joints that were tight in summer can open in winter, so details must allow movement.
How is a finished flashing checked?
With a probe at terminations and, where possible, a water test. The result is photographed and added to the file.